Modify Git history
A Git commit cannot be changed, the sha for the commit will be replaced at all changes. However, the contents of a commit can be modified and committed again as a new commit with a new sha and the branch/tag can be moved to the modified (new) commit.
A commit can be reverted, the changes of a certain commit can be reverted and added as a new commit. Similar, a commit can be applied again (possibly to a new branch), known as cherry picking.
The commit can be added again (and all commits that are children to the commit) as new commits and git branches can be made to point to the new commit instead.
There are 2 different cases, and consequently 2 ways to do it with git when we want to modify the history:
Modify the last commit of the current branch with doing an
amendModify an older commit with doing an
interactive rebase
Note: There are 2 things to understand when working with the history with git:
As git only creates immutable commits (sealed by the sha1), “modifying” a commit is in fact creating a new more or less similar commit.
Consequently, the entire history of children following the changed commit will be different.
So, except if the history has not been already pushed, or if you have good reasons, it is a bad practice to change the history because you will mess the history of other developers.
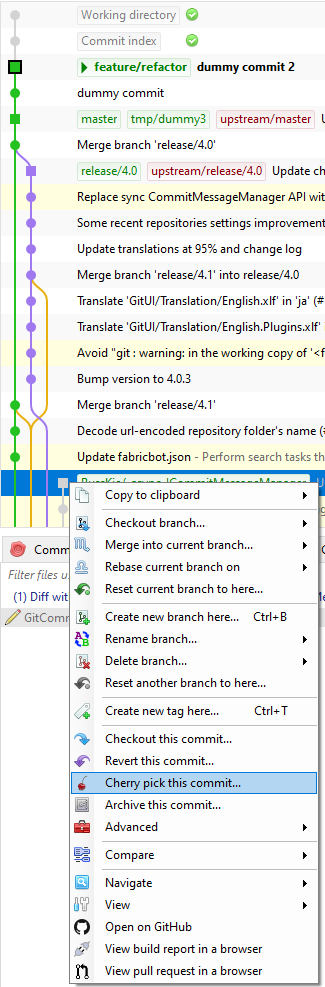
Cherry pick commit
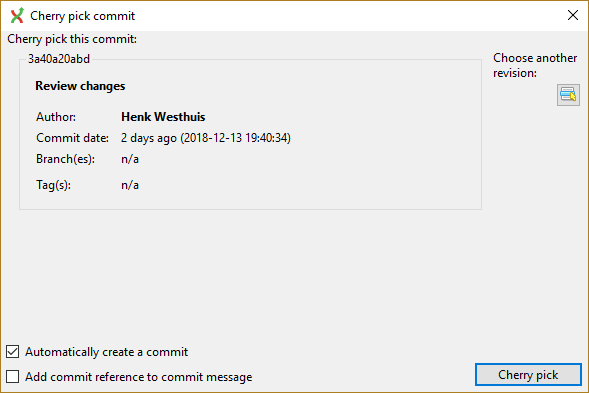
A commit can be recommitted by using the cherry pick function. This can be very useful when you want to make the same change on multiple branches. Select the commit (or range of commits) you want to cheery pick:
The confirm dialog opens:
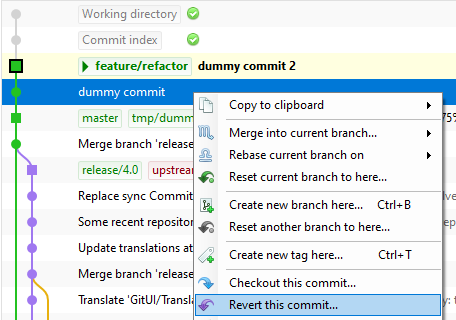
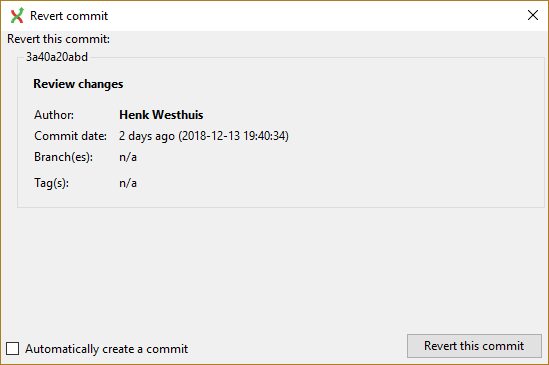
Revert commit
A commit cannot be deleted once it is published. If you need to undo the changes made in a commit, you need to create a new commit that undoes the changes. This is called a revert commit. A revert commit is similar to a cherry pick, but the cherry pick tries to apply the same changes as the original commit, a revert will try to reverse the changes.
The confirm dialog opens:
Modify the last commit
The easiest way to modify the last commit is to do an amend commit.
To do that, open the commit windows and check the option “Amend commit”.
If the commit message text area was empty, it is now filled with the message of the last commit.
You could now just update the commit message and commit or also add some more changes in the staging area to
add them to the commit.

Modify an older commit
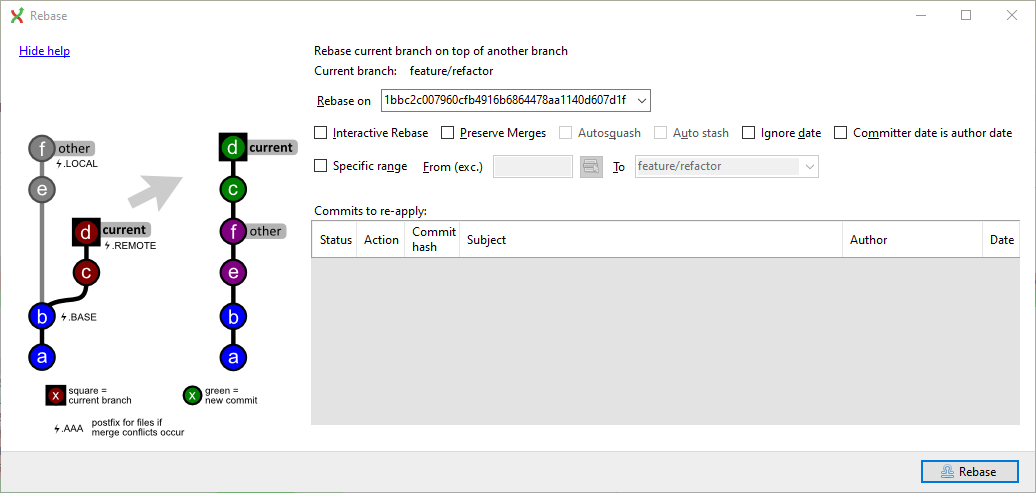
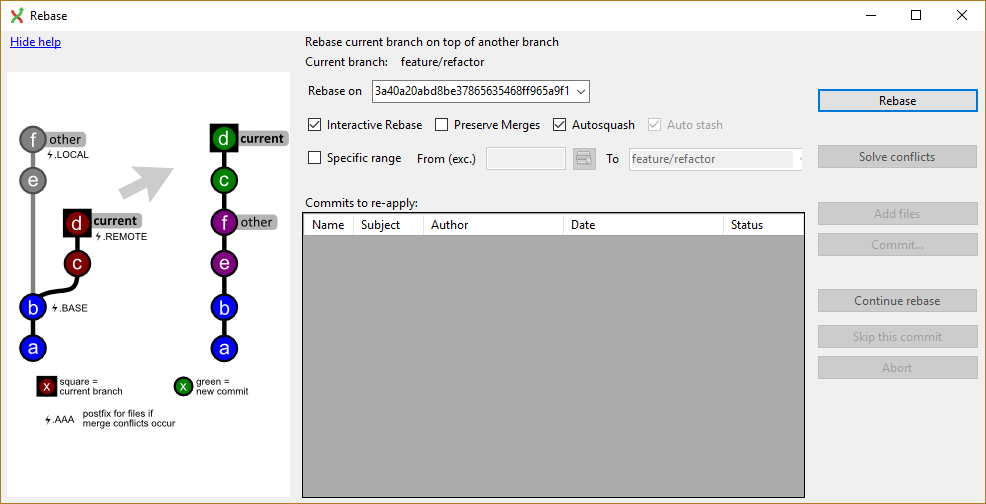
It normally makes sense just to change the history for the current branch. To change the parents of the current branch you will have to make a rebase. Git Extensions has functionality that wraps the Git rebase commands and simplifies usage in some situations.
Interactive rebase
First, you should create a commit containing the changes you want to add to a previous commit (or know an existing commit that contains this changes).
Then use the rebase feature in interactive mode on a base commit older than the one that you want to modify. See Branches for how to start a rebase, start an interactive rebase from the context menu or by selecting the checkbox in the rebase dialog.
You will be prompted by a text editor displaying all the commits that will be rebased
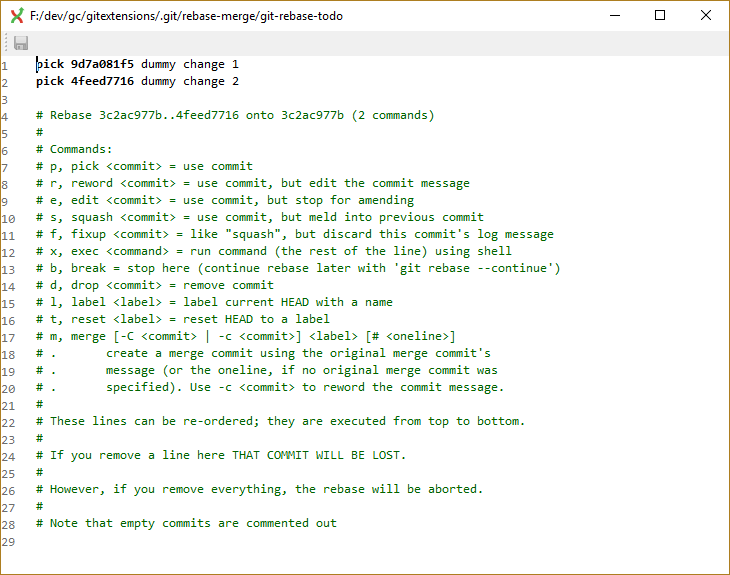
You could have a look to Git documentation to better understand all the possibilities offered.
The options offered are :
reorder the lines to reorder the commits,
remove a line to throw away a commit and the changes introduced by the commit,
write r or reword in front of a commit to rewrite the commit message,
write f or fixup in front of a commit to meld the commit with the previous commit and with keeping the commit message of the first commit,
write s or squash in front of a commit to meld the commit with the previous commit and with rewriting the commit message.
Often, we will use interactive rebase to move the line and squash or fixup commits to modify the history.
Once we did the changes, save and close the editor to let git do the rebase.
Using autosquash rebase feature
There is an option to facilitate the use of the interactive rebase when you know, at the moment of doing a
commit that the changes introduced by this commit should have been made in an older commit (the case of a fixup or squash).
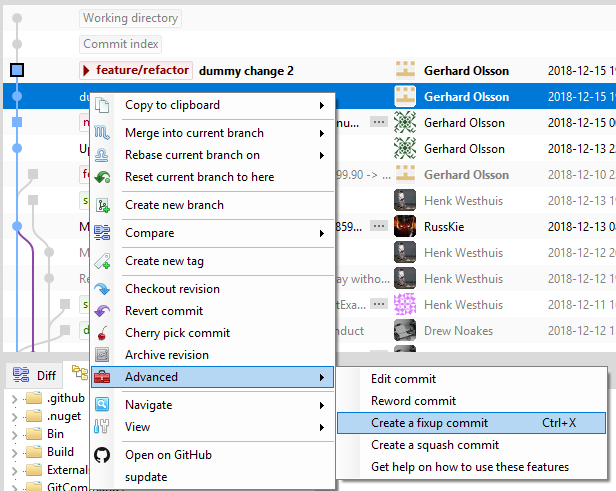
In this case, you should create a commit containing the changes you want to add to a previous commit and use the Advanced menu to:
create a fixup commit
create a squash commit
Right click on the commit in the history, you know that you want to “modify”.
And choose the suitable option…
If you have not the changes prior to open the dialog, do them now.
GitExtensions will open the commit window with an already filled commit message containing the needed information to find the commit to “modify”. Do not change the commit message and commit all the changes needed.
Then process to the interactive rebase, like describe in the previous paragraph but with enabling the option Autosquash.
Launch the rebase by clicking on Rebase.
The interactive rebase will process the same way but with a major difference! When enabling the Autosquash option, git will automatically reorder the commits lines and write the good actions in front of the commits when it will open the text editor. You normally have just to close the editor (except if you want to do additional changes). And let git do the rebase.
Edit/reword commit
These options are the same as starting an interactive rebase on the parent to the selected commit and doing an edit (allow to amend to the commit) or reword (editing the commit message) and then run an interactive rebase in the background.
Note especially that this functionality will fail if you try to edit/reword a commit that is not a parent to the current checkout.
Rebase onto
When you would like to rebase a branch, it could happen that you don’t want to rebase all the commits of the branch that git will by default determine to rebase.
One possibility is to do an interactive rebase and when git open the editor to let you decide what actions you will do on commits, you keep only the lines corresponding to the commit(s) you want to rebase (See interactive rebase to throw away a commit!)
If that is the last commit(s) of the branch that you want to rebase, you could instead do a Rebase onto where you select the range of commits to rebase by defining from which commit (not included!) you will start the rebase.
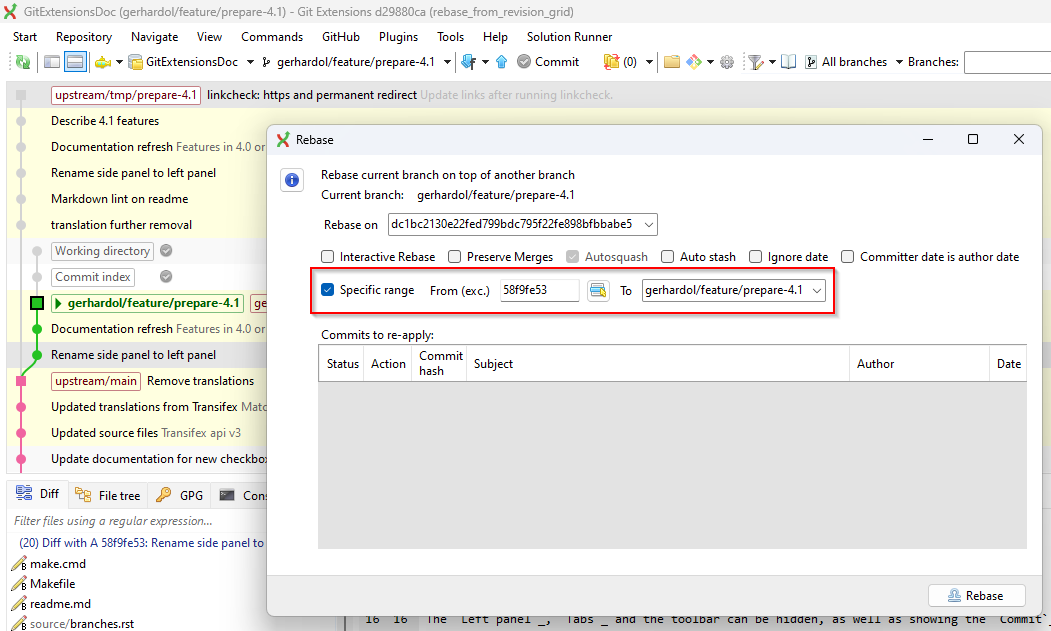
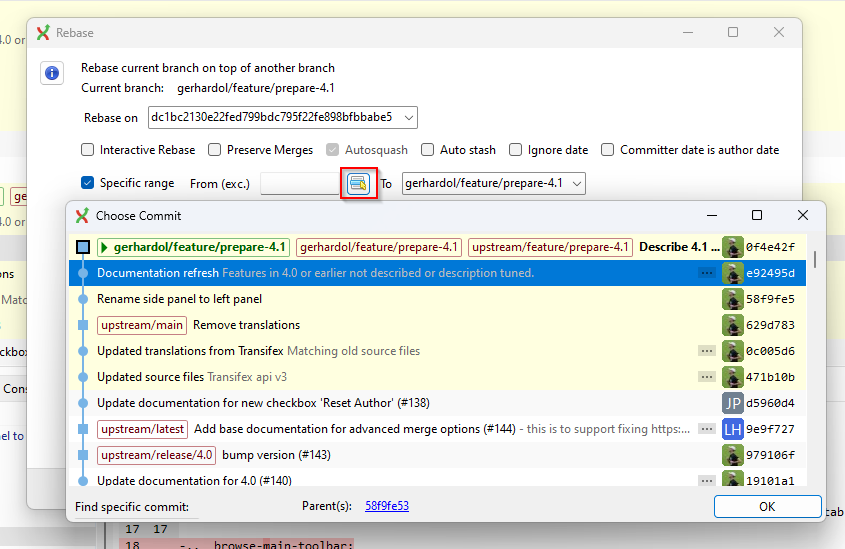
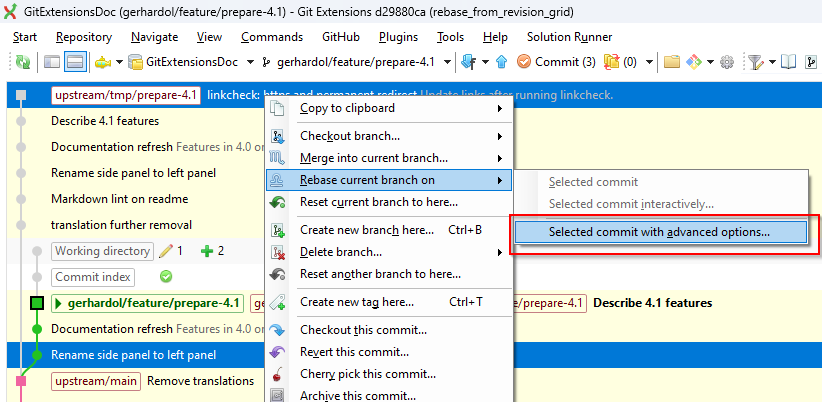
To select the base commit from which the range selection will be made, you have to options in Git Extensions:
You can use the commit selection popup-up:
Or you could do it by selecting two commits from the revision grid. The first one selected will fill the from field. The second will be the target commit when the branch will be rebased onto:
Warning: When doing a rebase onto, the from commit defining the range of commit(s) that will be rebased must be an ancestor of the current branch checked out that will be rebased.
Merge Conflicts
When merging or rebasing branches or commits you can get conflicts. Git will try to resolve these, but some conflicts need to be resolved manually. Git Extensions will show warnings when there is a merge conflict in the status bar in the bottom right corner.
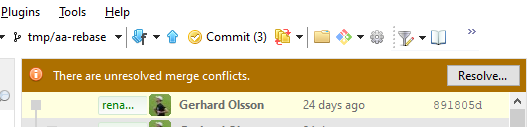
Handle merge conflicts
To solve merge conflicts just click on a warning or open the Solve merge conflicts... dialog from the Commands menu. A dialog will prompt
showing all conflicts.
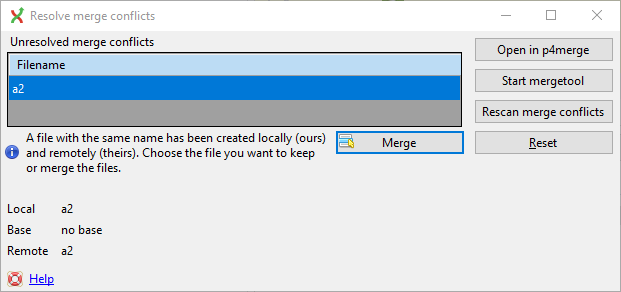
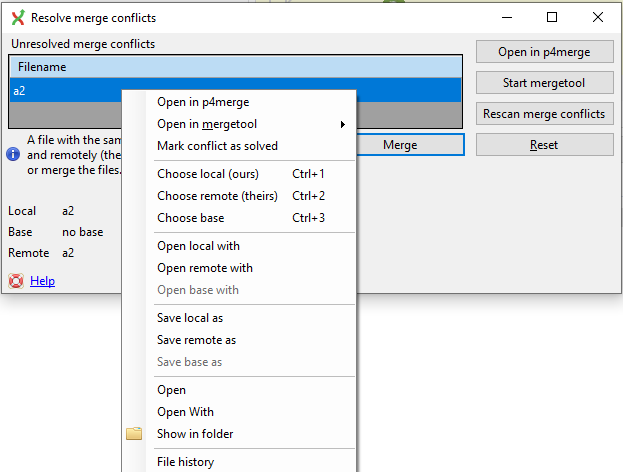
The context menu shows the actions to resolve the conflicts. Double-click on a filename will start the mergetool.
There are three kinds of conflicts:
File deleted and changed |
Use modified or deleted file? |
File deleted and created |
Use created or deleted file? |
File changed both locally and remotely |
Start merge tool. |
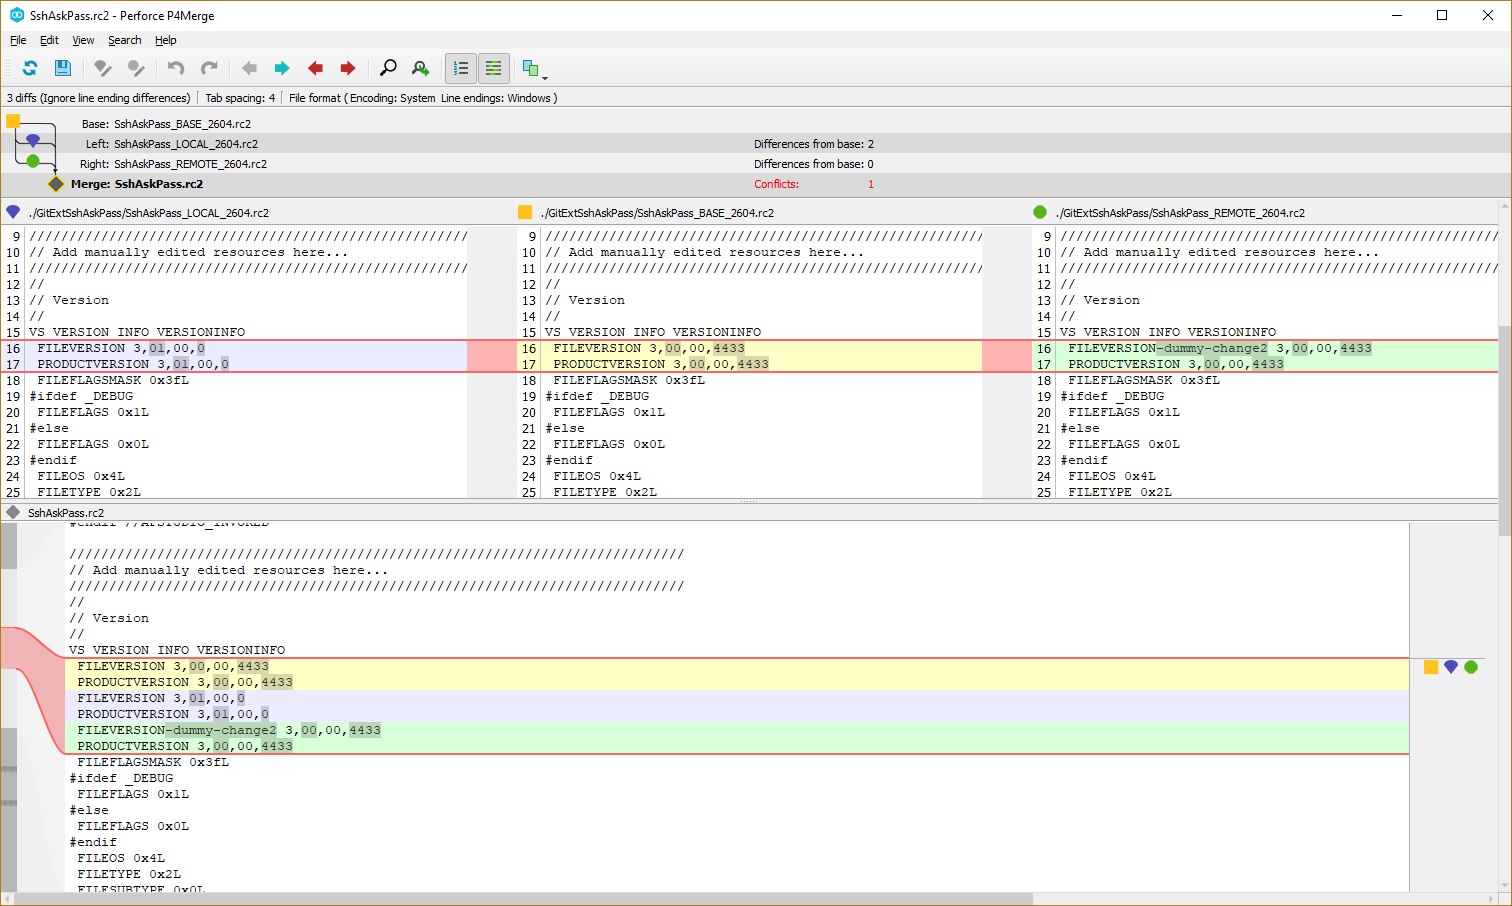
If the file is deleted in one commit and changed in another commit, a dialog will ask to keep the modified file or delete the file. When there is a conflicting change the merge tool will be started. You can configure the tool you want to use for merge conflicts. The image below shows Perforce P4Merge, a merge tool free to use for small teams.
In the merge tool you will see four versions of the same file:
Base |
The latest version of the file that exist in both repositories |
Local |
The latest local version of the file |
Remote |
The latest remote version of the file |
Merged |
The result of the merge |
Caution
When you are in the middle of a merge the file named local represents your file. When you are in the middle of a rebase the file named remote represents your file. This can be confusing, so double check if you are in doubt.