Branches
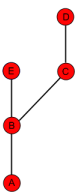
Branches are used to commit changes separate from other commits. It is very common to create a new branch when you start working on a feature to keep the work done on that feature separate from other work. When the feature is complete the branch can be merged or rebased as you choose such that the commits for the feature either remain as a parallel branch or appear as a continuous single line of development as if the branch had never existed in the first place. The image on the right illustrates a branch created on top of commit B.
You can see the name of your current branch in a combo box in the toolbar. You can switch to another branch by
choosing from the combo box list. In the commit log the current branch has an arrow head to the left of its name. If
you are not currently on a branch because you have checked out a specific commit but not any particular branch then
Git Extensions will show (no branch) in place of a branch name in the toolbar. This is called “Detached HEAD
mode”. In Git you can refer to your current branch or commit by the special reference HEAD in place of the
branch name or commit reference.

Create branch
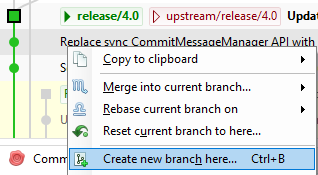
In Git Extensions there are multiple ways to create a new branch. In the image below I create a new branch from the context menu in the commit log. This will create a new branch on the revision that is selected.
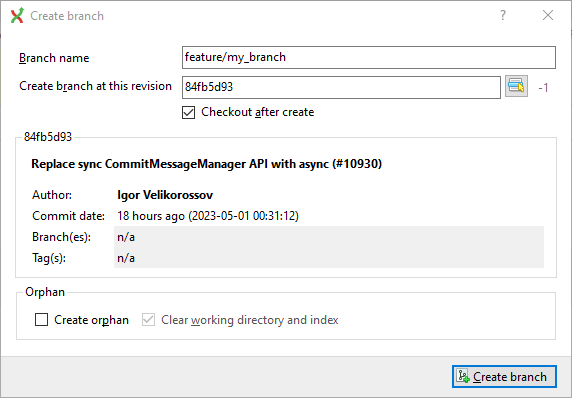
I will create a new branch called feature/my_branch. In this branch I can do whatever I want without affecting others.
The default in Git Extensions is to check out a new branch after it is created. If you want to create a new branch
but remain on your current branch, uncheck the Checkout after create checkbox in the Create branch dialog.
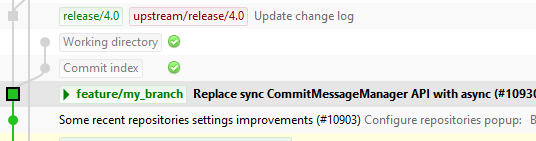
When the branch is created you will see the new branch feature/my_branch in the commit log. If you chose to checkout this
branch the next commit will be committed to the new branch.
Creating branches in Git requires only 41 bytes of space in the repository. Creating a new branch is very easy and fast. The complete work flow of Git is optimized for branching and merging.
Orphan branches
In special cases it is helpful to have orphan branches (see for example https://www.google.com/search?q=why+use+orphan+branches+in+git).
Check the “Create orphan” checkbox to create an orphan branch (--orphan option in git).
The newly created branch will have no parent commits.
The option “Clear working dir and index” (git rm -rf) is active by default. So the working dir and index will be cleared.
If you uncheck the last option then the working dir and index will not be touched.
Checkout branch
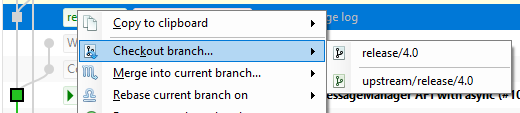
You can switch from the current branch to another branch using the checkout command. Checking out a branch sets the current
branch and updates all of the source files in the working directory. Uncommitted changes in the working directory can be
overwritten so it is best practice to make sure your working directory is clean by either committing or stashing any current
changes before checking out a branch. If you do not clean your working directory then, in the Checkout branch dialog, you
can choose between four options for your local uncommitted changes:
|
Local changes will be retained if there are not conflicting changes from the branch you are checking out. |
|
Performs a three-way merge between your current branch, your local changes and the branch you are checking out. |
|
Your local changes are stashed and the new branch is checked out. You can retrieve your changes on the new branch with stash-pop. |
|
Your local changes are discarded and the new branch is checked out. Use caution with this option as Git has no record of uncommitted changes so they cannot be retrieved. |
Merge branches
In the image below there are two branches, [feature/refactor] and [master]. We can merge the commits from the master branch
into the feature/refactor branch. If we do this, the feature/refactor branch will be up to date with the master branch, but not the other way around.
As long as we are working on the feature/refactor branch we cannot touch the master branch itself. We can merge the sources of
master into our branch, but cannot make any change to the master branch.
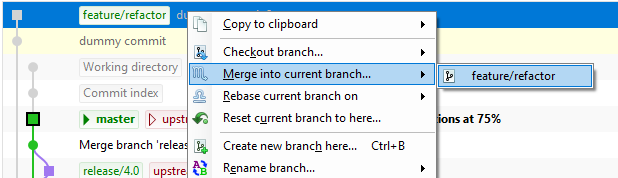
To merge the feature/refactor branch into the master branch, we first need to switch to the master branch.
Once we are on the master branch, select the feature/refactor branch and select merge. Alternatively choose Merge branches from the Commands menu and select the feature/refactor branch.
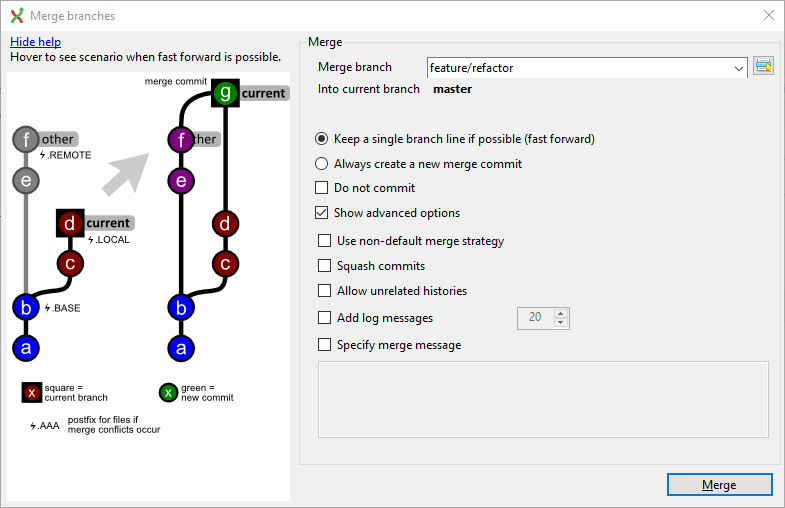
In the merge dialog you can verify which branch you are working on, as well as set advanced merge options (see Advanced Merge Options). Select the branch to merge with then click the Merge button.
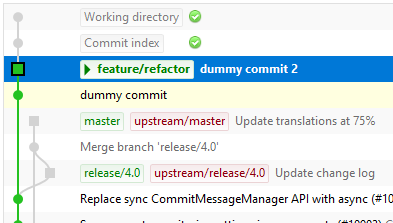
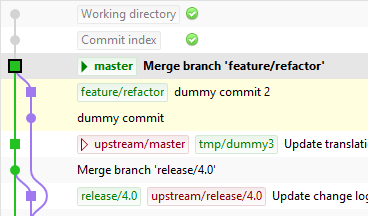
After the merge the commit log will show the new commit containing the merge. Notice that the feature/refactor branch is not changed by this merge. If you want to continue working on the feature/refactor branch you can merge the feature/refactor branch with master. You can instead delete the feature/refactor branch if it is not used anymore.
For more information about merge conflicts and further options, see Merge Conflicts.
Advanced Merge Options
The Show advanced options checkbox will show the following options when activated:
Use non-default merge strategy, with a drop-down field for selecting the alternate merge strategy. The strategies are:
resolve
This can only resolve two heads (i.e. the current branch and another branch you pulled from) using a 3-way merge algorithm. It tries to carefully detect criss-cross merge ambiguities and is considered generally safe and fast.
recursive
This can only resolve two heads using a 3-way merge algorithm. When there is more than one common ancestor that can be used for 3-way merge, it creates a merged tree of the common ancestors and uses that as the reference tree for the 3-way merge. Additionally this can detect and handle merges involving renames. This is the default merge strategy when pulling or merging one branch.
octopus
This resolves cases with more than two heads, but refuses to do a complex merge that needs manual resolution. It is primarily meant to be used for bundling topic branch heads together. This is the default merge strategy when pulling or merging more than one branch.
ours
This resolves any number of heads, but the resulting tree of the merge is always that of the current branch head, effectively ignoring all changes from all other branches. It is meant to be used to supersede old development history of side branches.
subtree
This is a modified recursive strategy. When merging trees A and B, if B corresponds to a subtree of A, B is first adjusted to match the tree structure of A, instead of reading the trees at the same level. This adjustment is also done to the common ancestor tree.
Squash commits
Allow unrelated histories
Add log messages, with an input field for specifying number of log messages to add
Specify merge message, with an input field for specifying a custom merge message
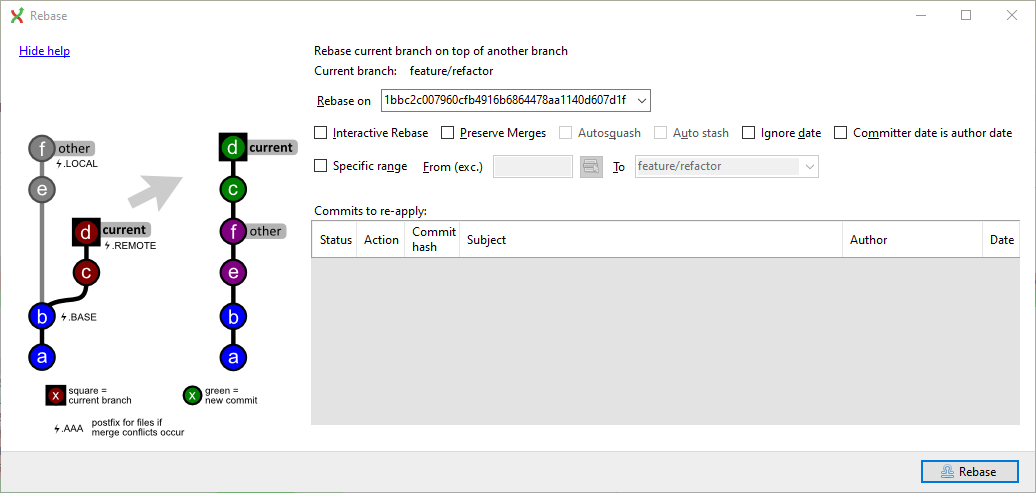
Rebase branch
The rebase command is very similar to the merge command. Both rebase and merge are used to get a branch up-to-date. The main difference is that rebase can be used to keep the history linear contrary to merges.
Select the commit where you want to to rebase the current branch.
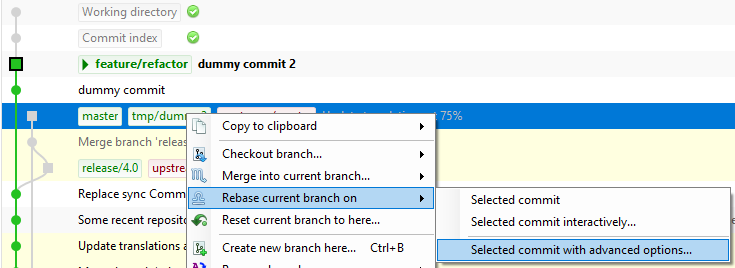
A rebase of feature/refactor on top of master will perform the following actions:
The branch feature/refactor will be moved to the master branch
The commits in the previous feature/refactor branch will be recommitted in the moved feature/refactor branch
Note
During a rebase merge conflicts can occur. You need to solve the merge conflicts for each commit that is rebased. The rebase function in Git Extensions will guide you through all steps needed for a successful rebase. See Merge Conflicts for more information.
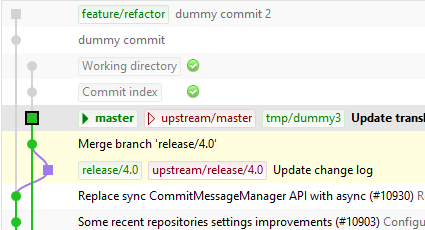
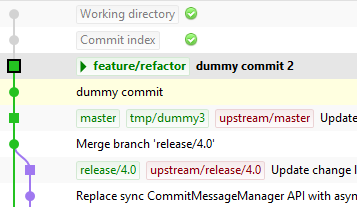
The image below shows the commit log after the rebase. Notice that the history is changed and it seems like the commits on the feature/refactor branch are created after the commits on the master branch.
Warning
Because this function rewrites history you should only use this on branches that are not published to other repositories yet. When you rebase a branch that is already pushed it will be harder to pull or push to that remote. If you want to get a branch up-to-date that is already published you should merge.
Interactive rebase
It is possible to modify the order, merge commits etc when committing.
See Modify Git history for more information.
Squash
Git has no native squash operation, it can be done with various combinations of rebase and reset. This is described in the Git Extensions wiki.
See Modify Git history and Git documentation for more information.
Delete branch
Since it is common to create many branches, it is often necessary to delete branches. Most commonly you will need to delete branches on which work has finished and their contents are merged into master or your main branch. You can also delete unmerged branches when they are not needed anymore and you do not want to keep the work done in that branch.
When you delete a branch that is not yet merged, all of the commits that are in only the deleted branch will be lost. When you delete a branch that is already merged with another branch, the merged commits will not be lost because they are also part of another branch.
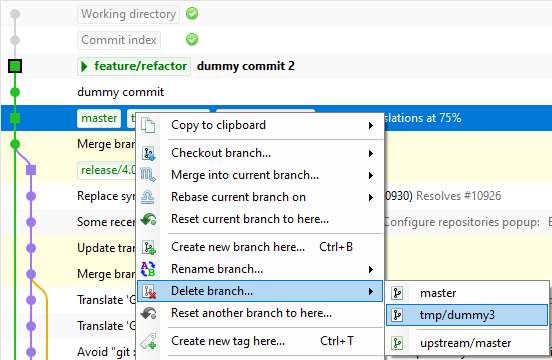
You can delete a branch using Delete branch from the Commands menu. If you want to delete a branch that is not merged into
your current branch (HEAD in Git), you need to check the Force delete checkbox.